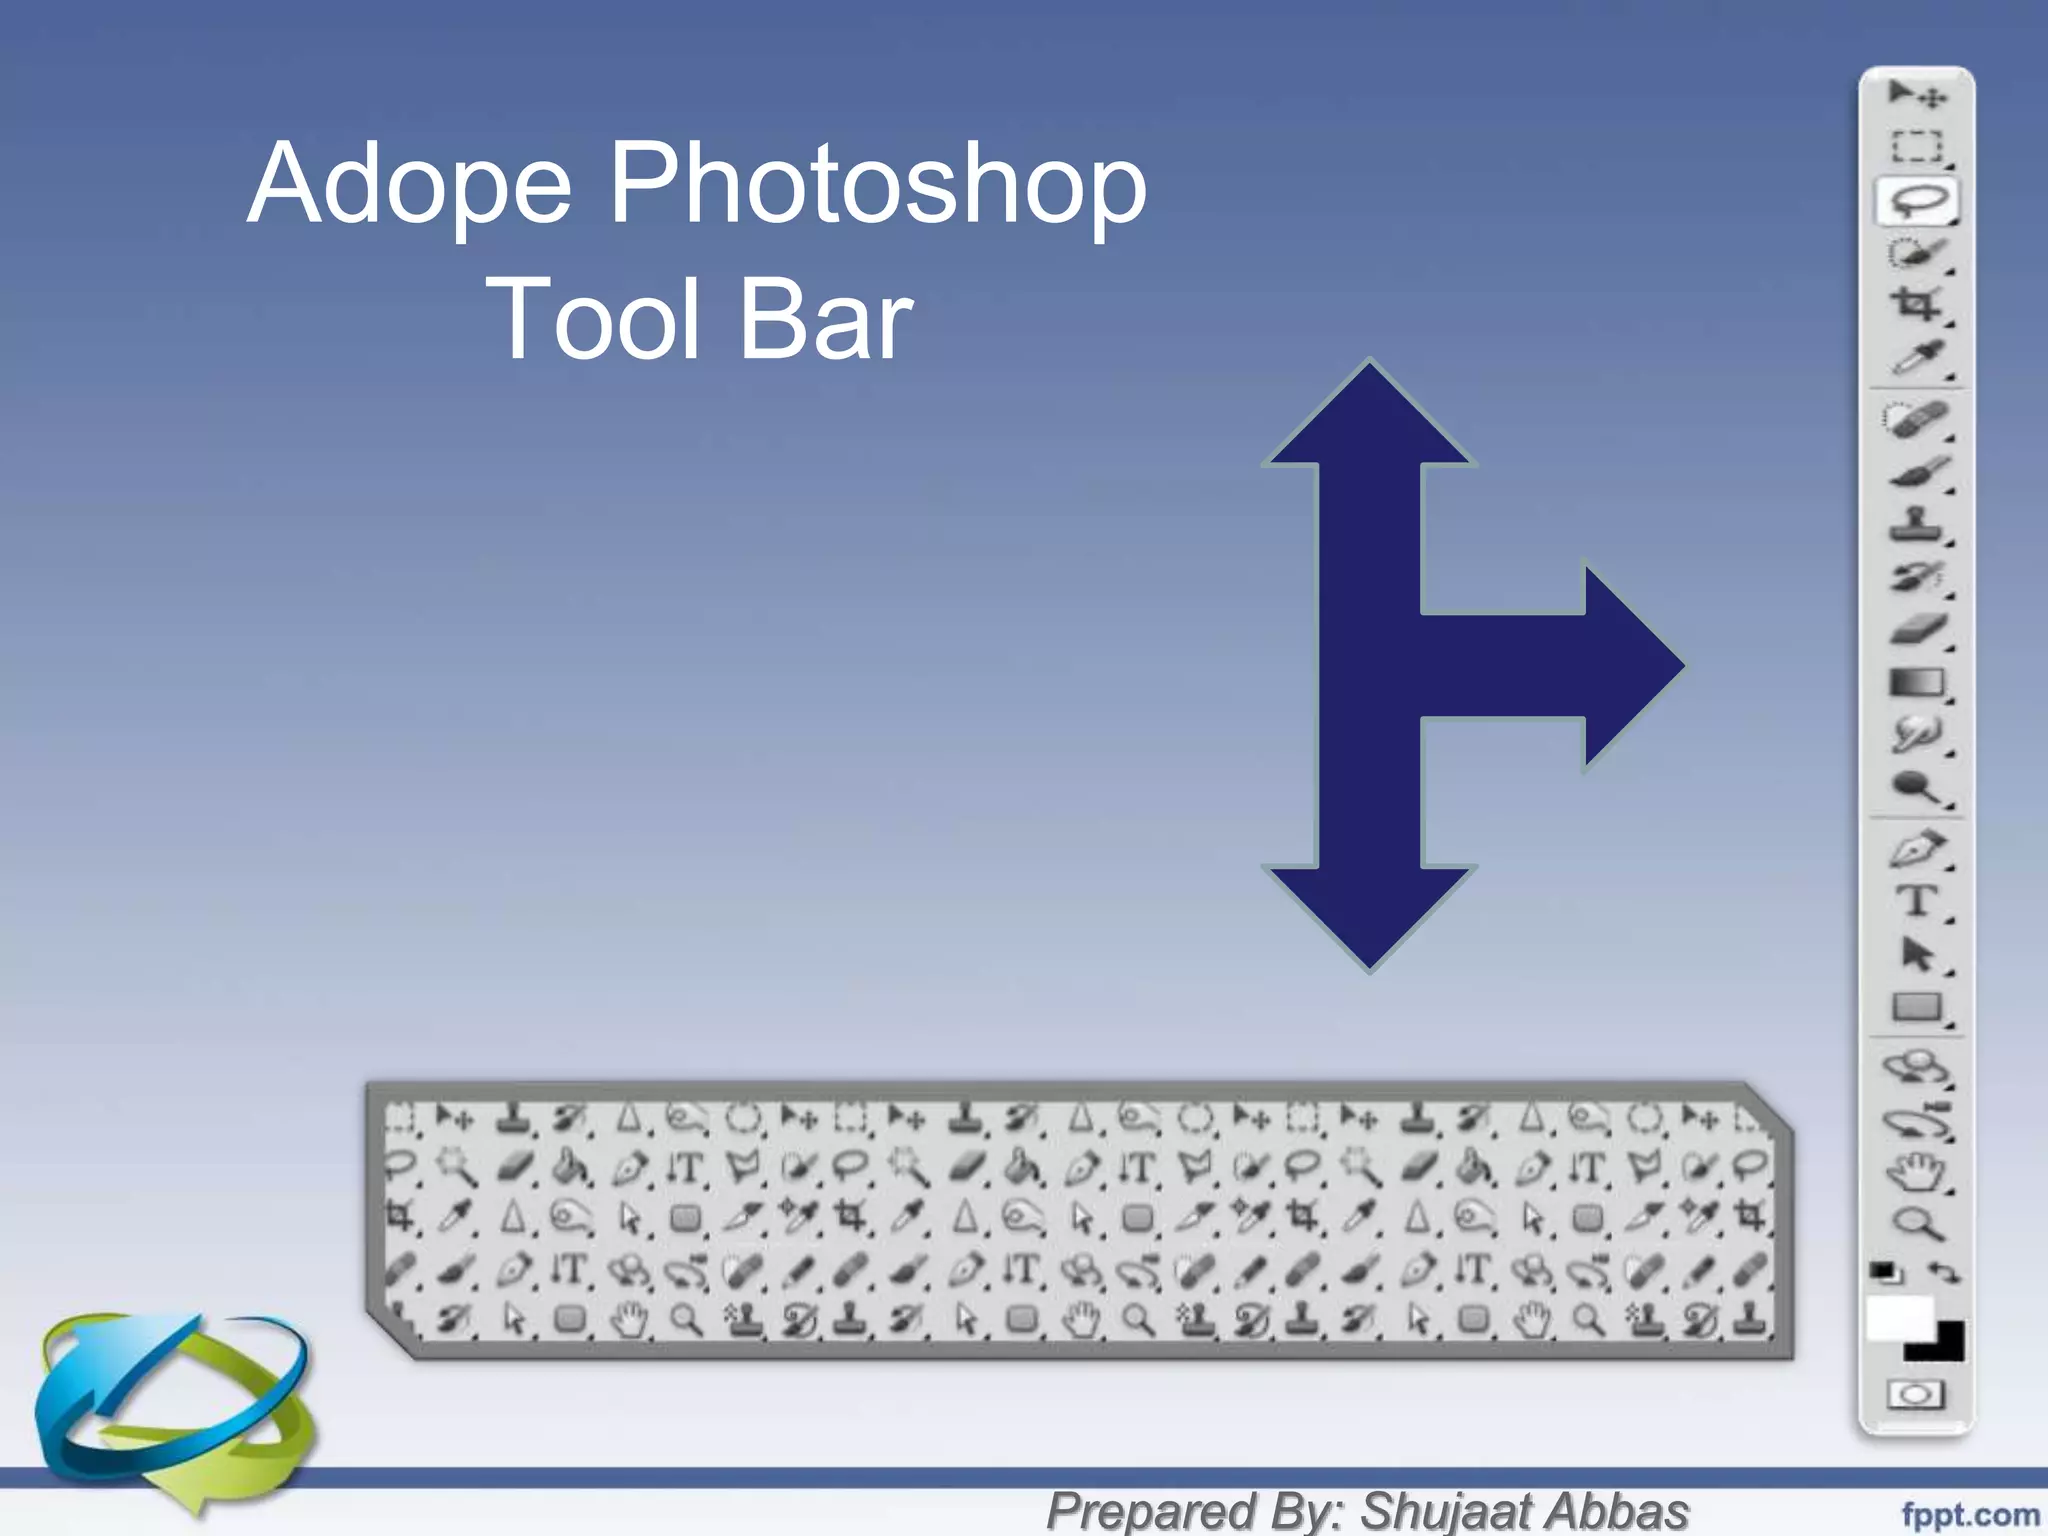
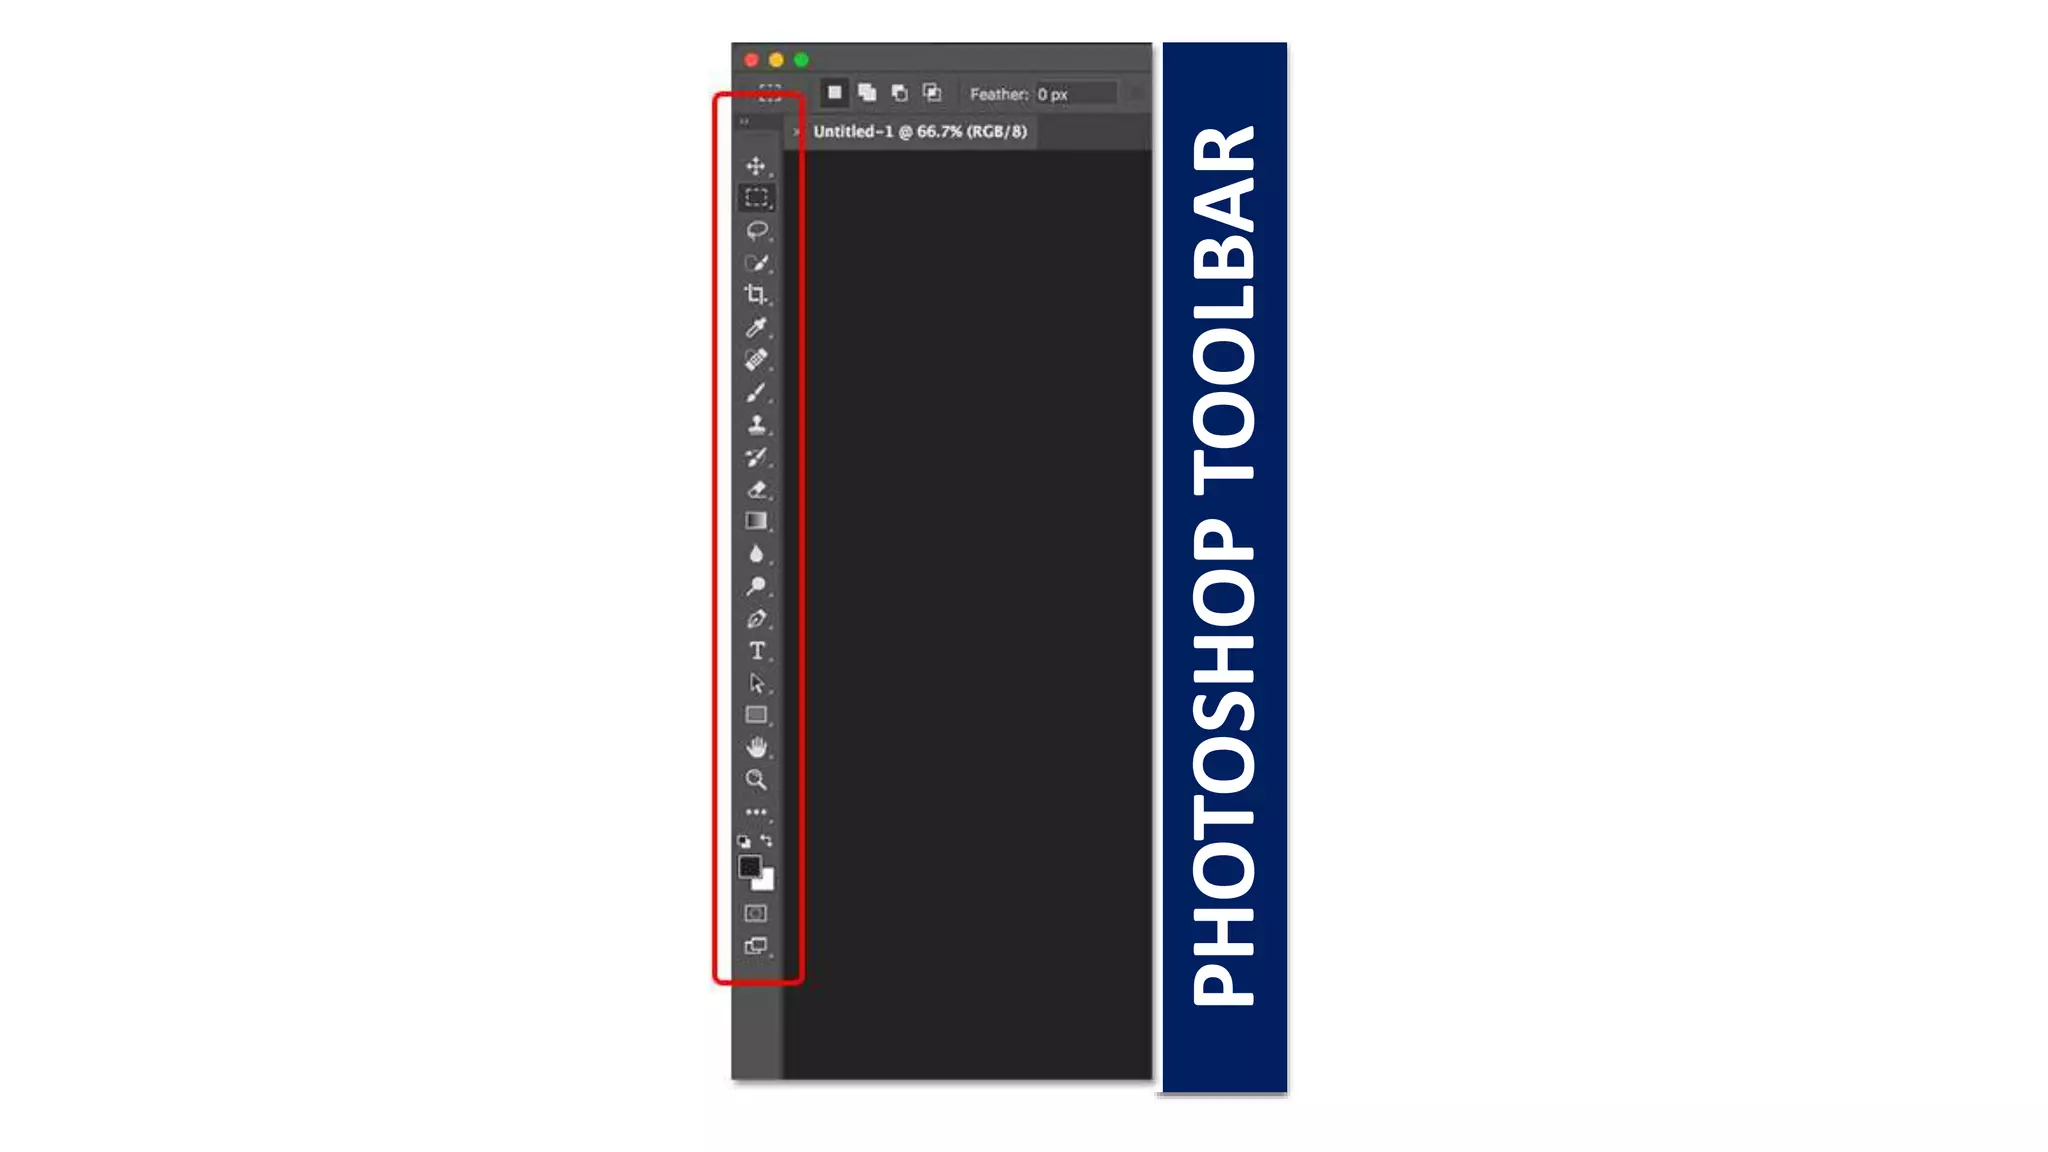
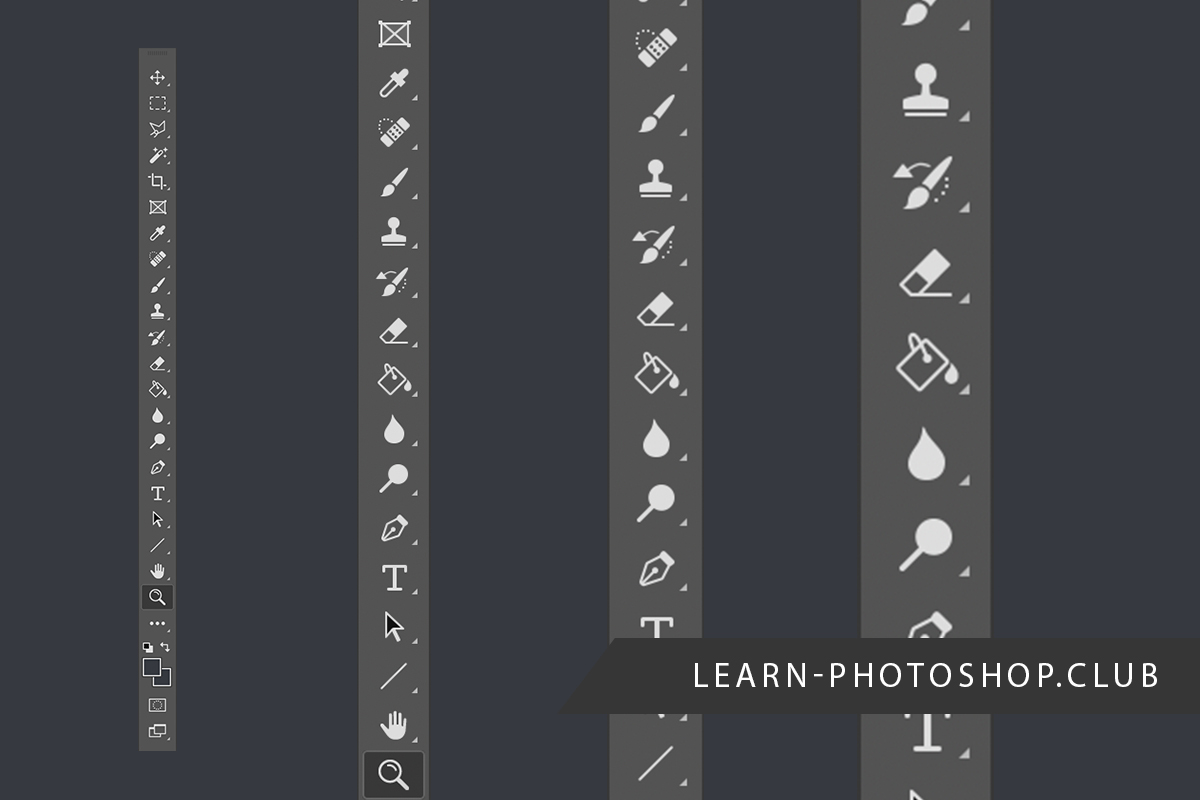
Adobe Photoshop’s Toolbar is the cornerstone of your creative workflow. It’s the vertical panel packed with icons, each representing a powerful tool ready to transform your images. Understanding what each tool does and how they interact is crucial for mastering Photoshop and unlocking its full potential. This guide breaks down the key tools within the Photoshop Toolbar, giving you a foundation to explore further and develop your artistic vision.
Exploring the Adobe Photoshop Toolbar
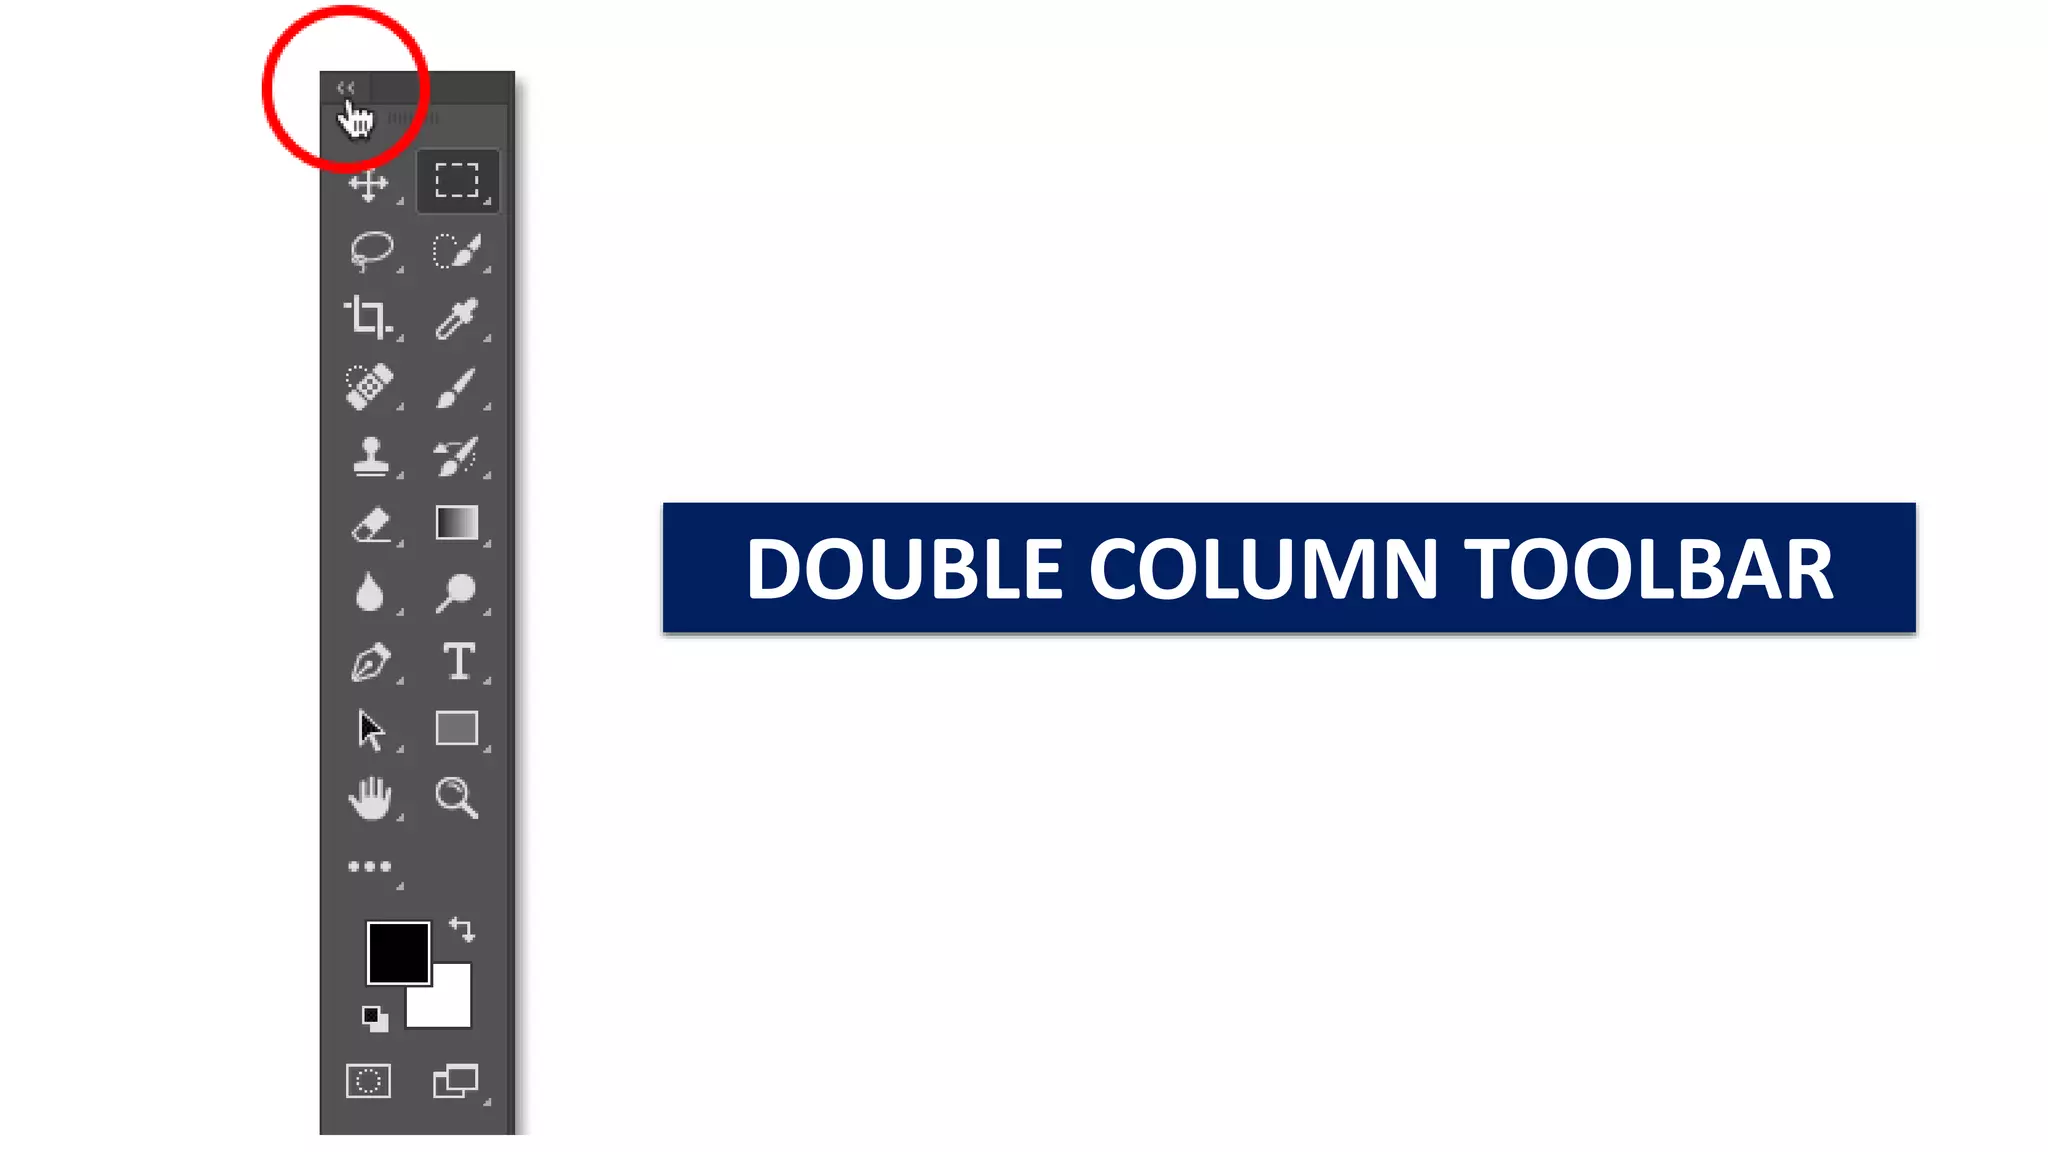
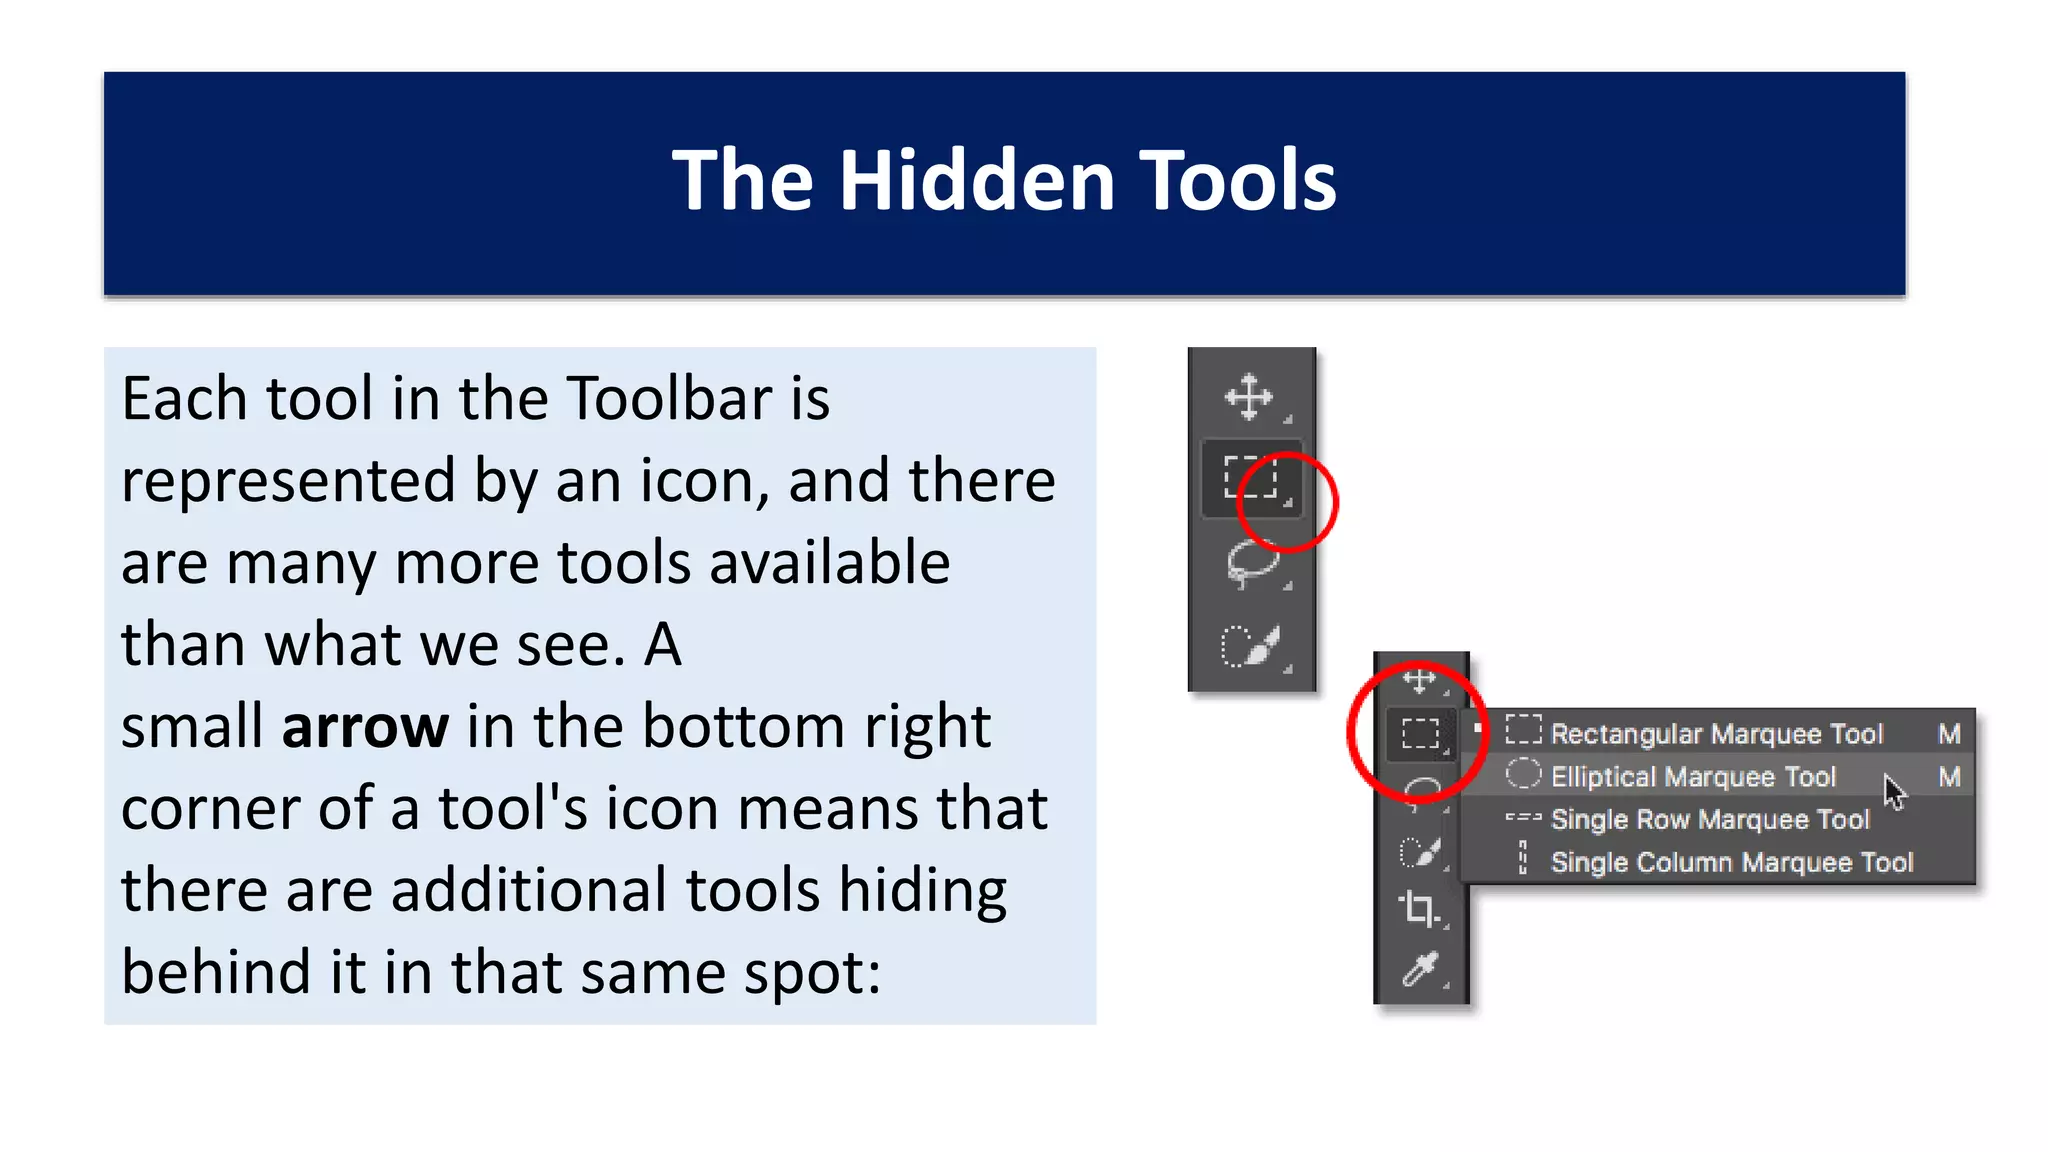
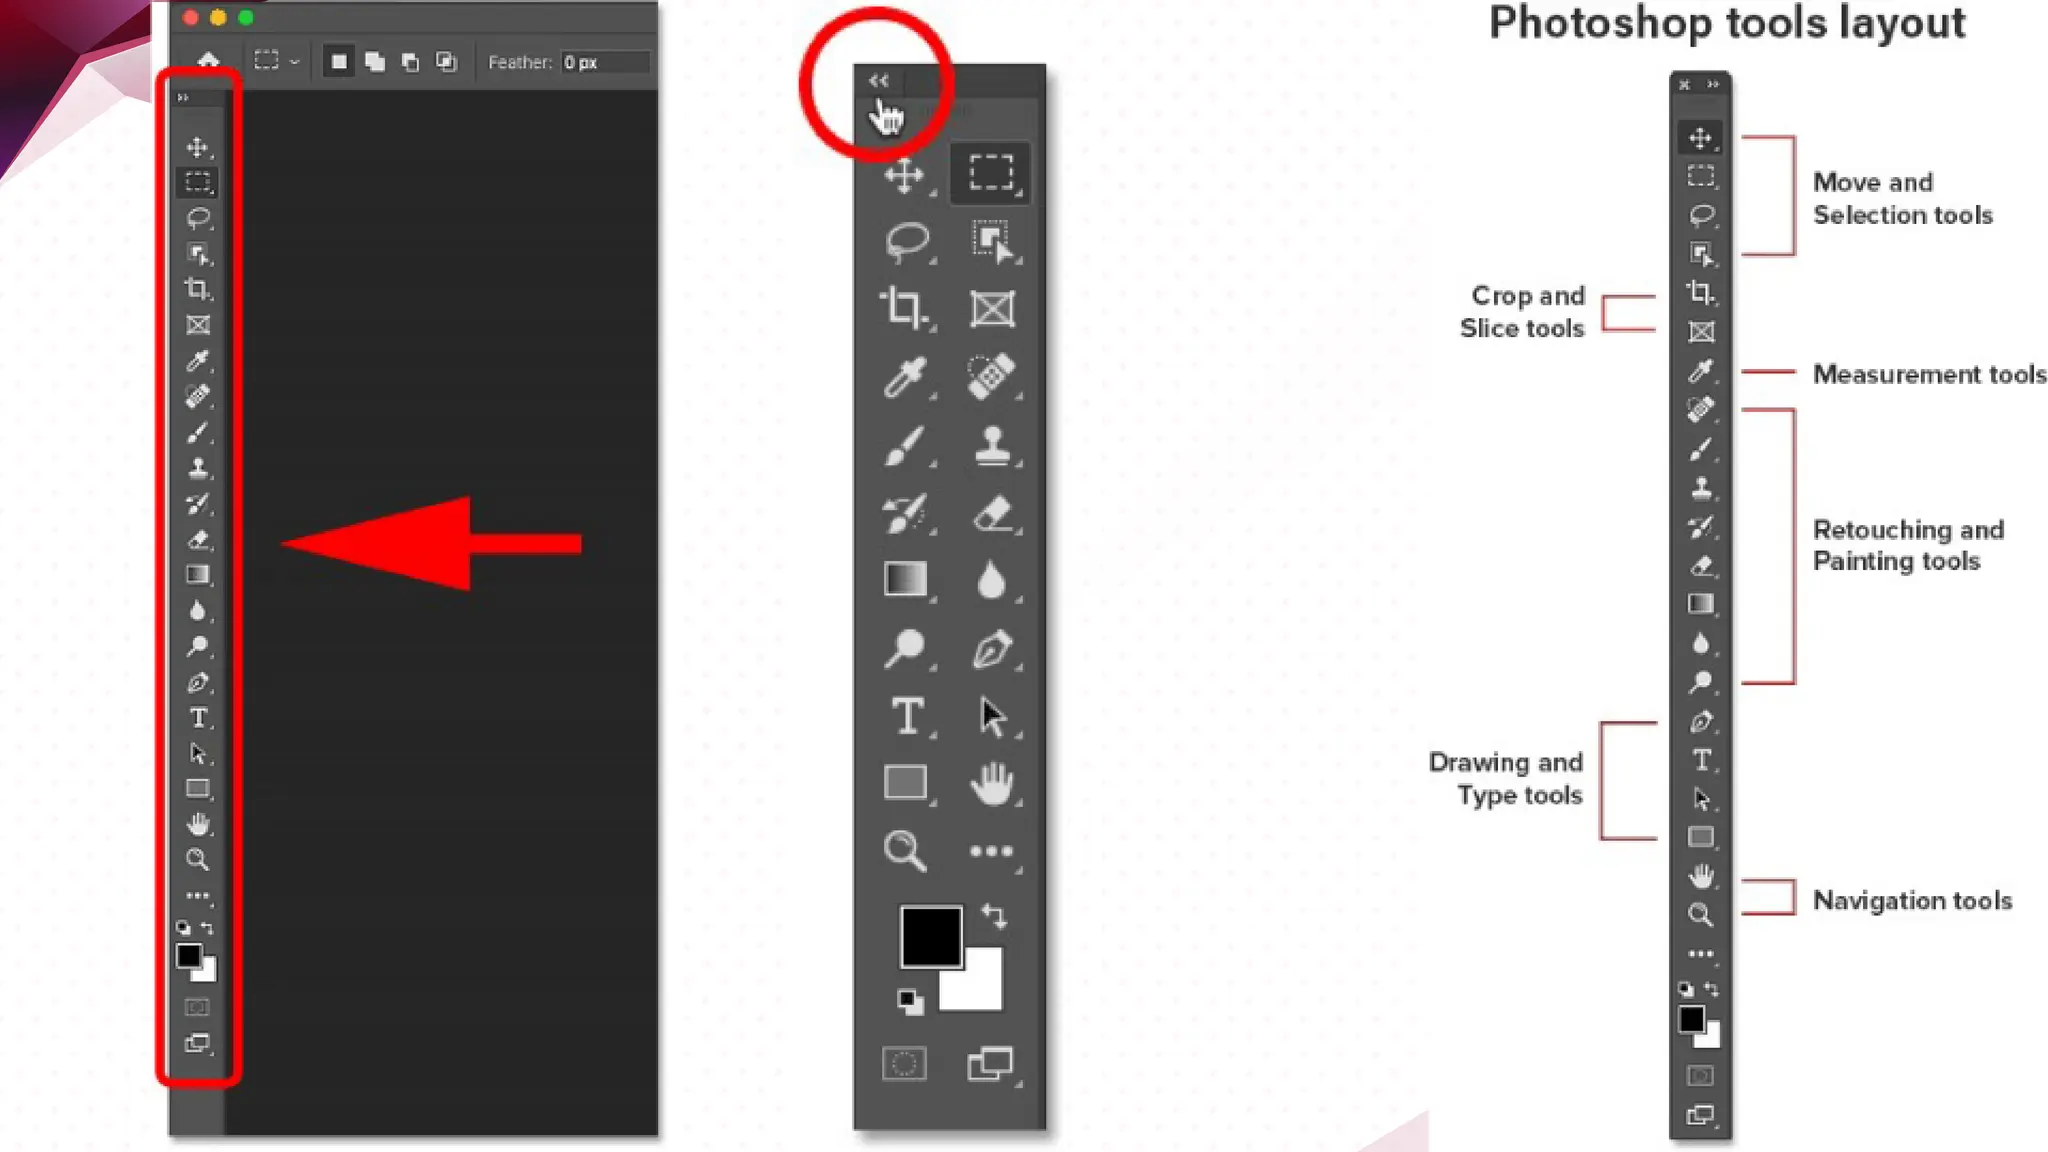
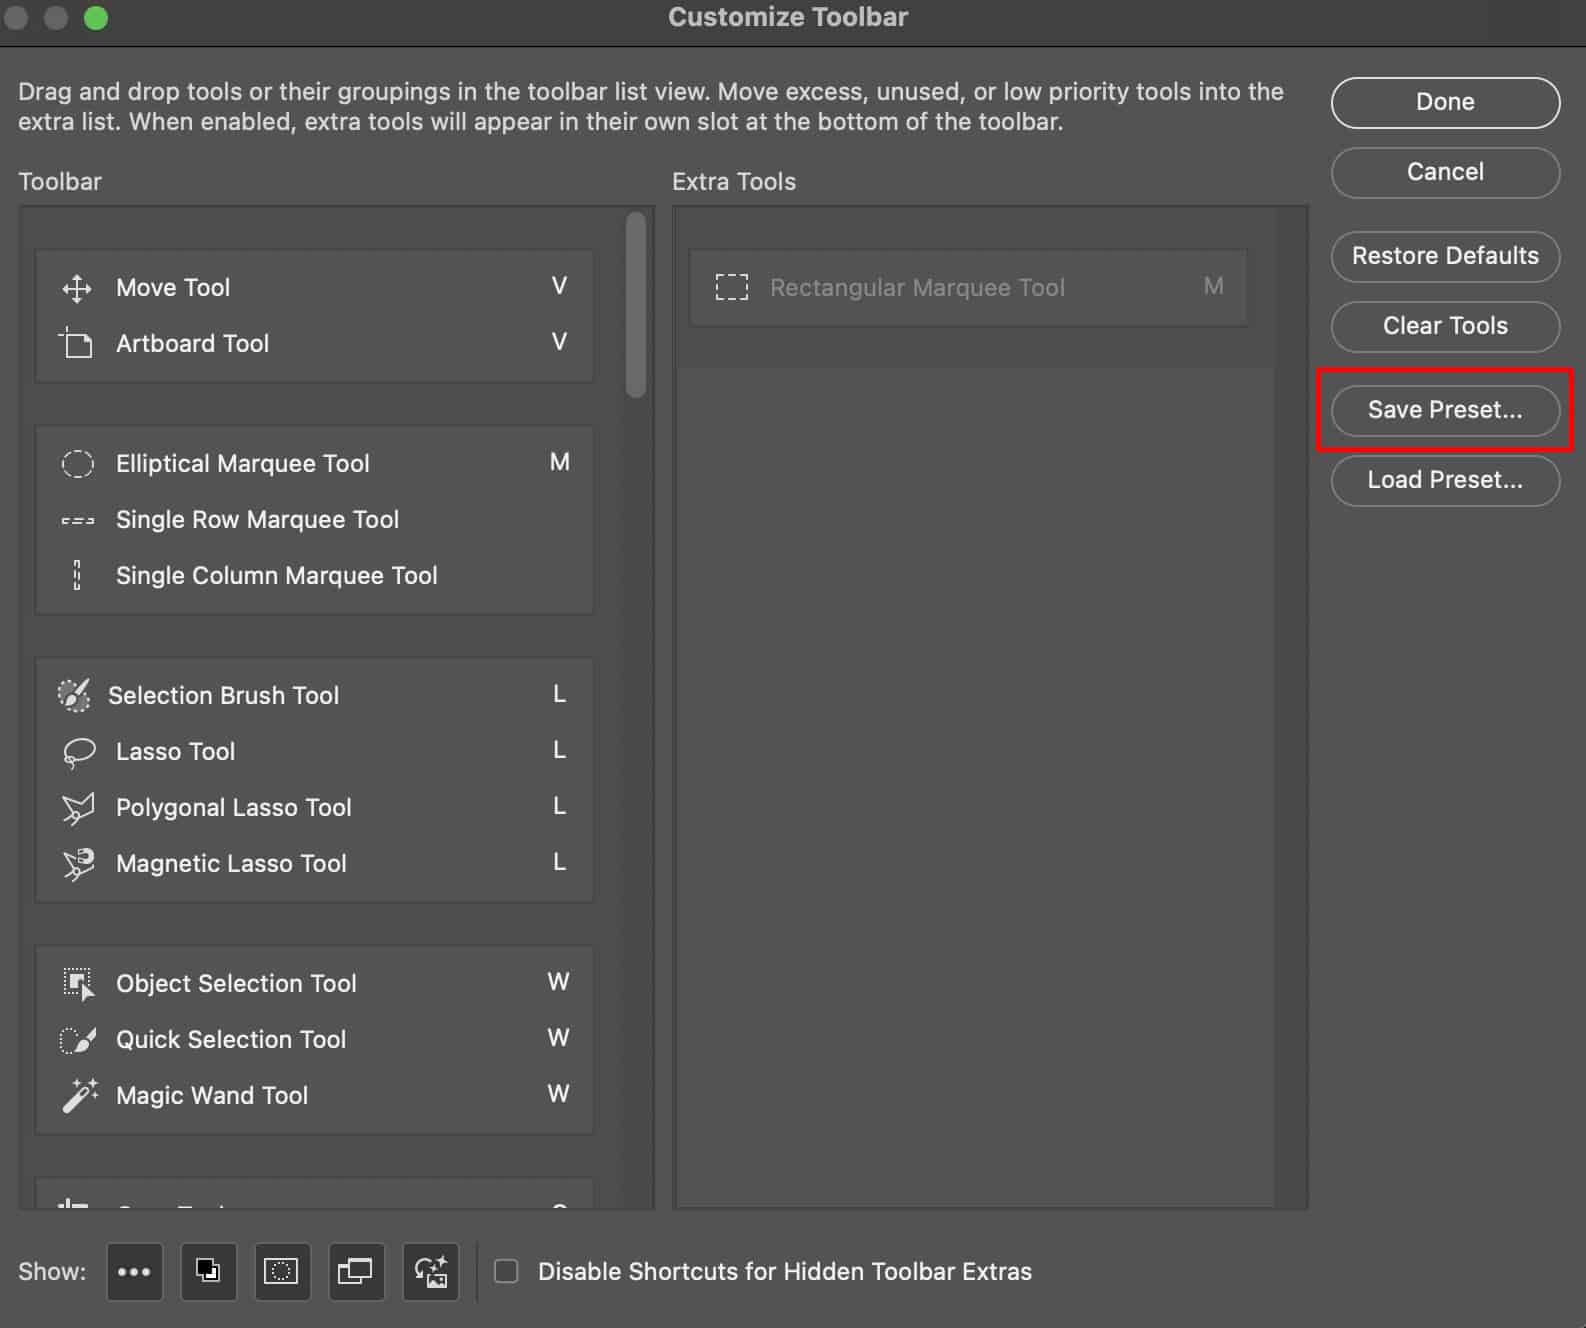
The Toolbar is more than just a collection of icons; it’s a dynamic hub. Many tools have hidden variations accessible by clicking and holding on the icon. Furthermore, double-clicking some tool icons will open a dedicated panel where you can fine-tune its settings. These settings greatly influence the tool’s behavior, allowing for precise and customized adjustments to your images.
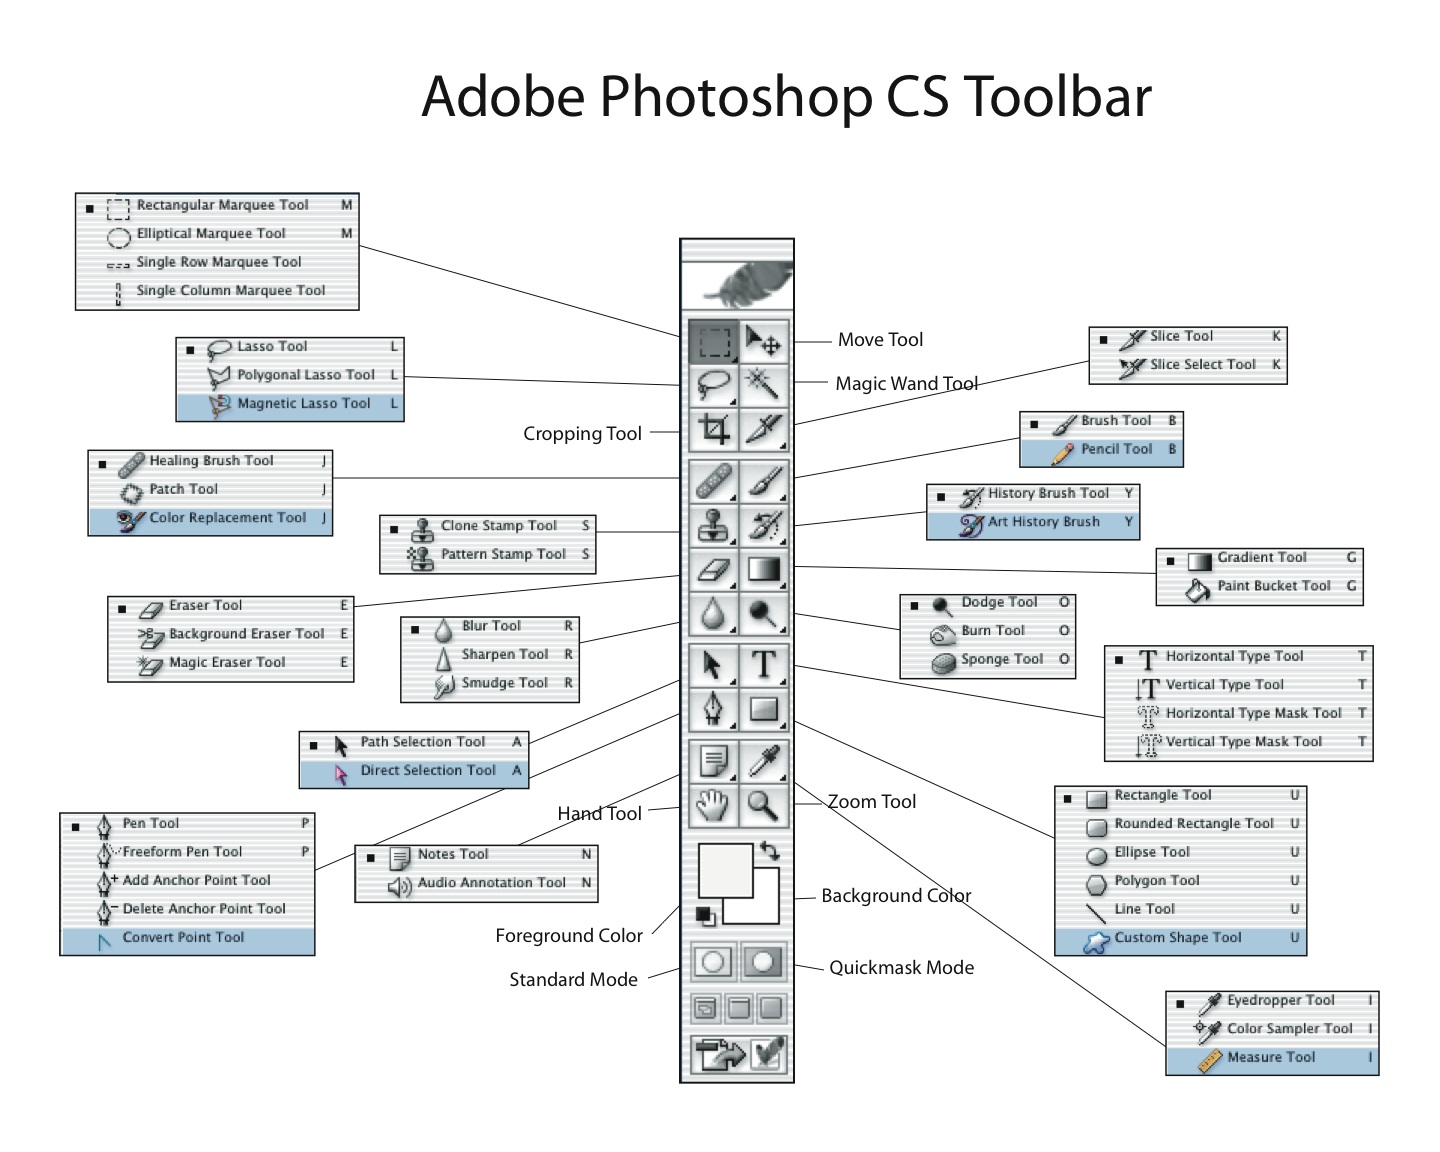
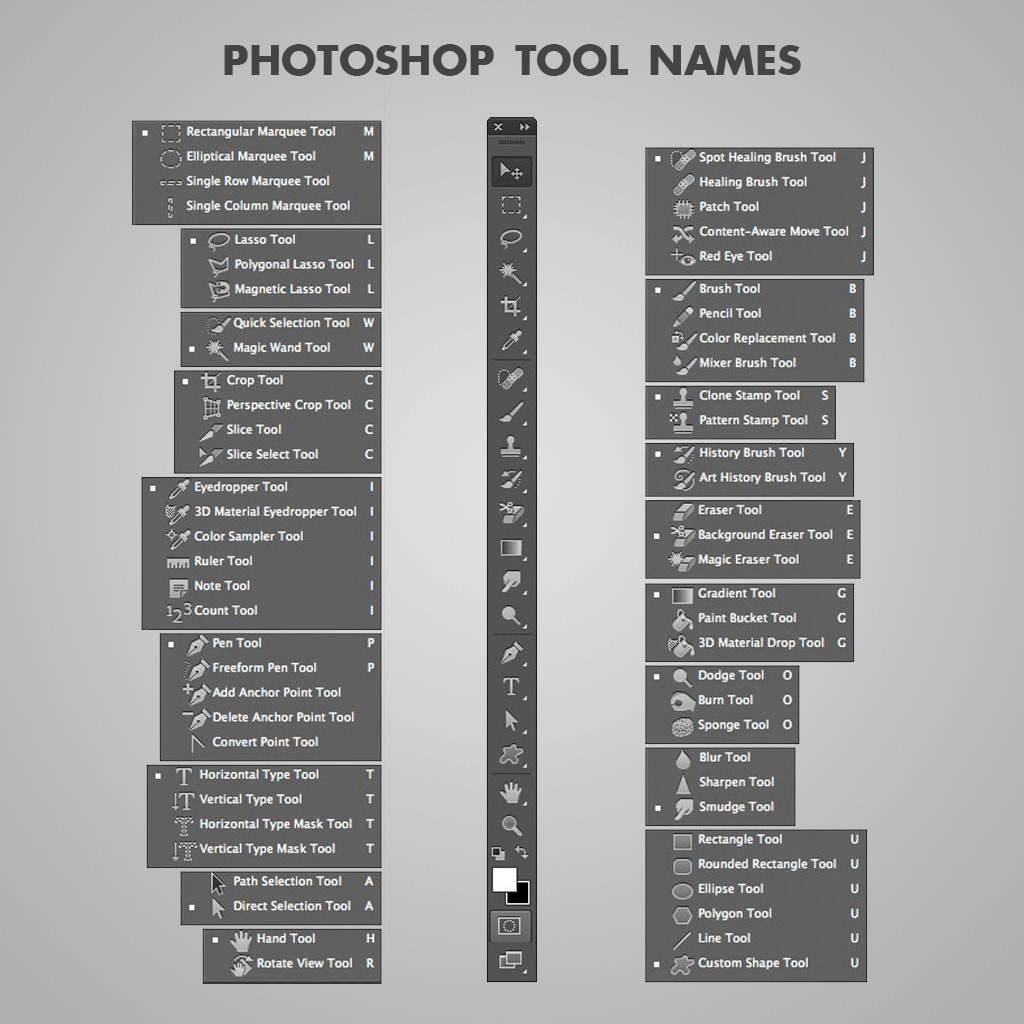
Let’s dive into the essential tools you’ll find in the Photoshop Toolbar, grouped for better understanding.
Selection Tools
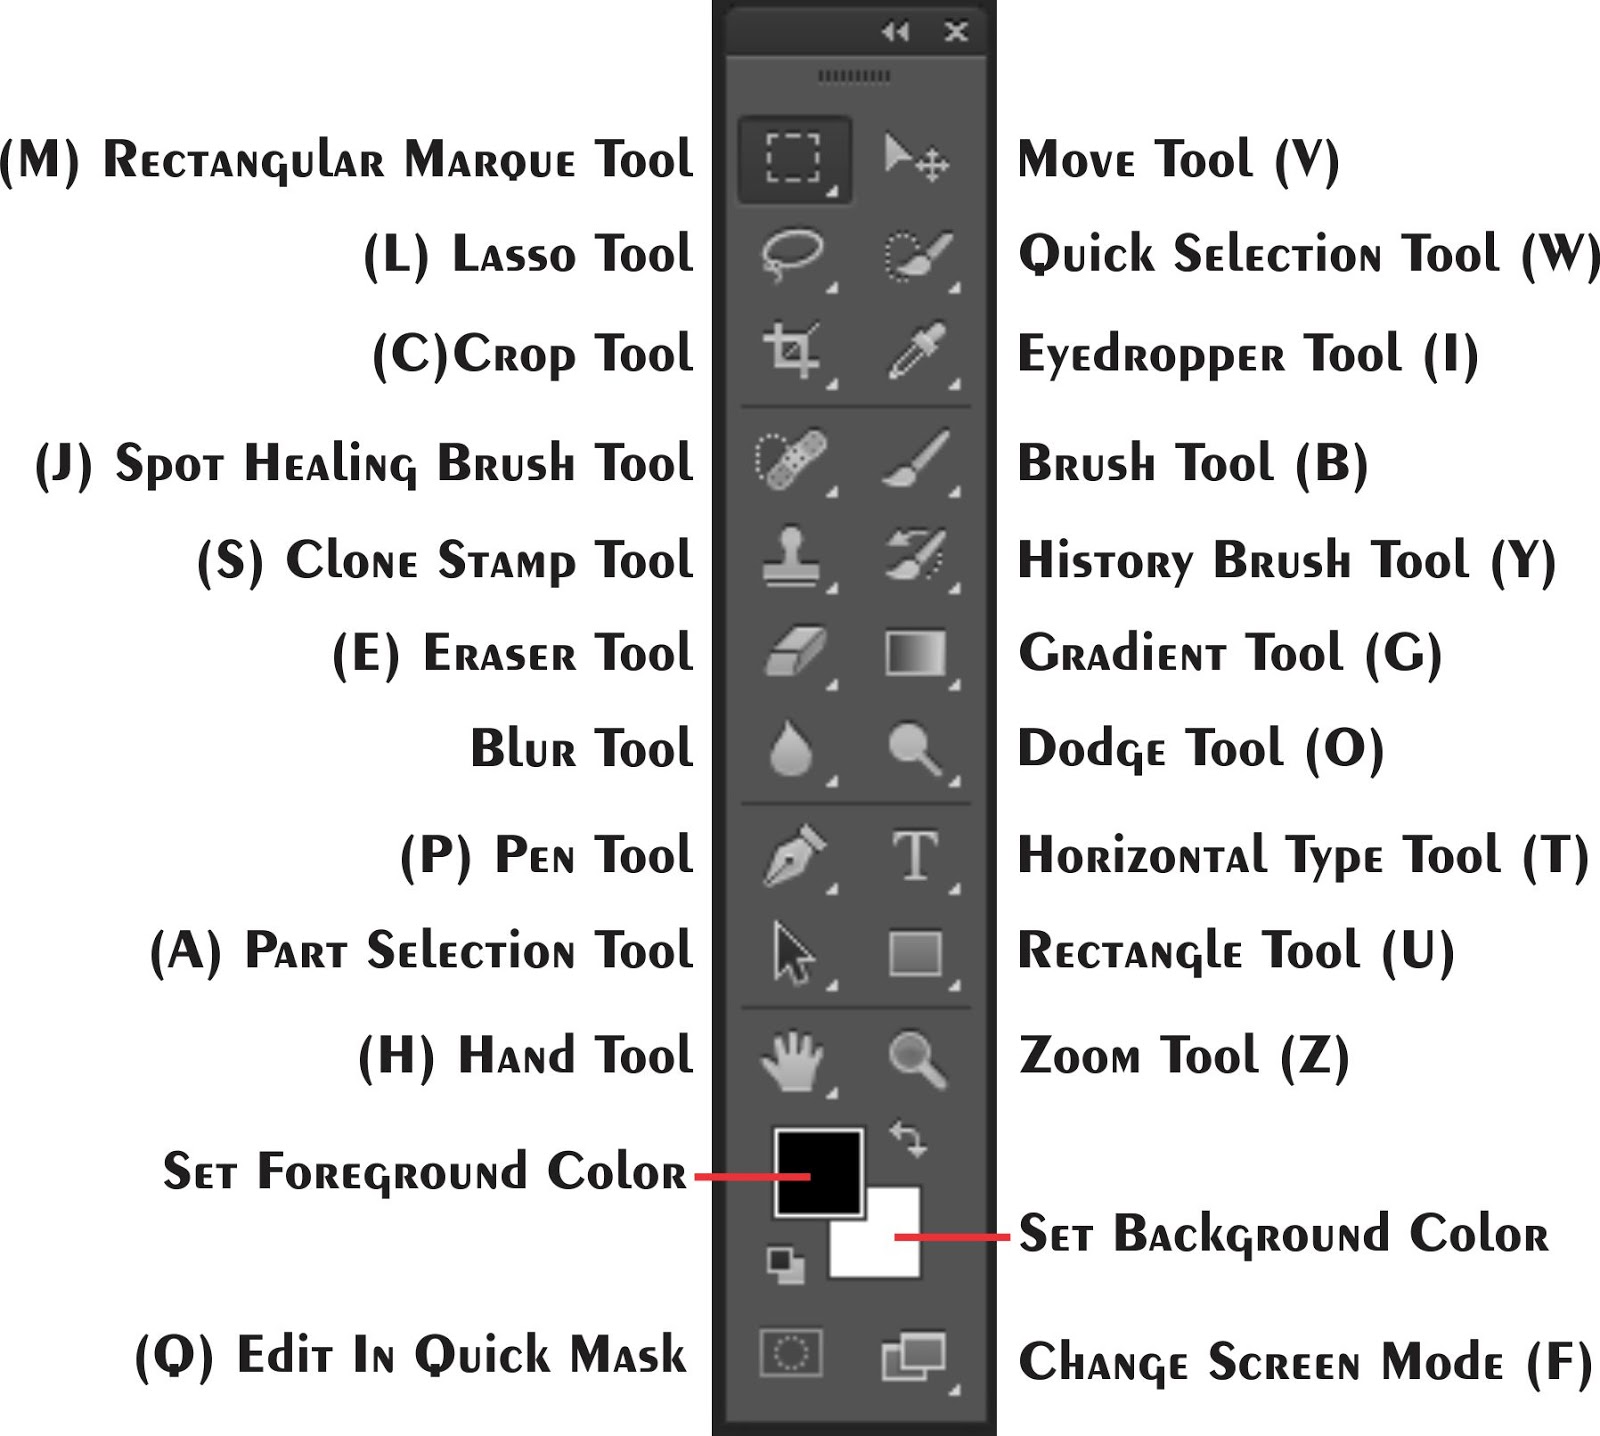
- Move Tool (V): The workhorse for moving layers, selections, and other elements around your canvas. It’s indispensable for arranging and repositioning components of your design.
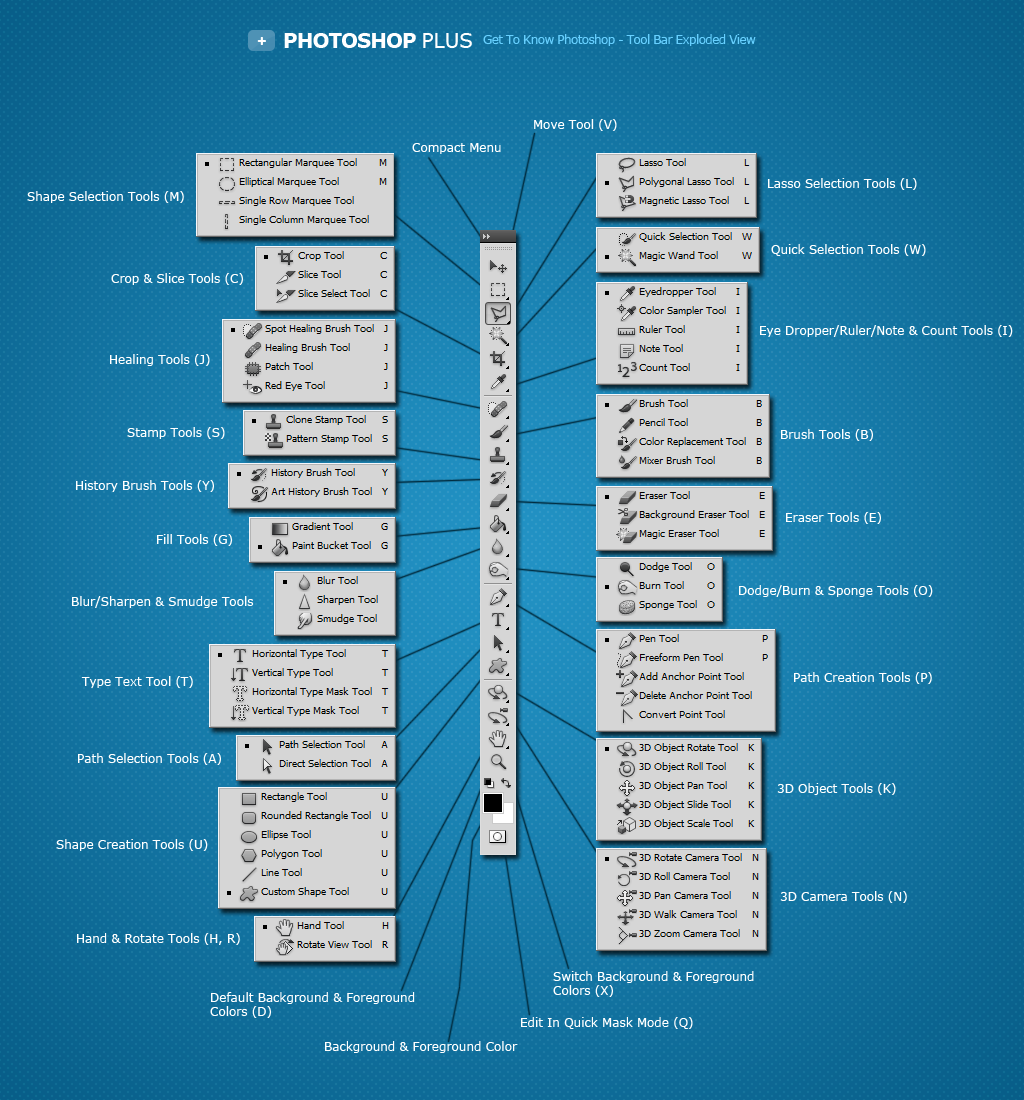
- Rectangular Marquee Tool (M): Creates rectangular or square selections. Holding Shift while dragging creates a perfect square.
- Elliptical Marquee Tool (M): Similar to the rectangular marquee tool, but creates elliptical or circular selections. Holding Shift creates a perfect circle.
- Lasso Tool (L): Allows you to make freehand selections, tracing around the areas you want to isolate.
- Polygonal Lasso Tool (L): Creates selections with straight lines, perfect for selecting objects with defined edges.
- Magnetic Lasso Tool (L): Attempts to snap to the edges of objects as you trace, making it useful for selecting items with high contrast.
- Object Selection Tool (W): New in recent versions, this tool uses AI to automatically detect and select objects within your image.
- Quick Selection Tool (W): Quickly selects areas based on color and texture similarity. It’s excellent for rough selections.
- Magic Wand Tool (W): Selects areas based on color range. Tolerance settings control how much color variation is included in the selection.
Cropping, Measuring, and Slicing
- Crop Tool (C): Crops the image to the desired dimensions, removing unwanted areas. You can specify aspect ratios or freeform crop.
- Perspective Crop Tool (C): Allows you to correct perspective distortion in images, making it ideal for straightening buildings or adjusting skewed photos.
- Slice Tool (C): Divides an image into smaller pieces (slices), often used for web design to optimize loading times.
- Slice Select Tool (C): Selects individual slices created with the Slice Tool.
- Eyedropper Tool (I): Samples colors from your image, allowing you to precisely match hues.
- 3D Material Eyedropper Tool (I): (If applicable, depending on your Photoshop version and workspace) Samples materials from 3D models.
- Color Sampler Tool (I): Allows you to sample up to four color points in your image, providing their color values in the Info panel.
- Ruler Tool (I): Measures distances and angles within your image.
- Note Tool (I): Adds text notes directly to your image file, useful for collaboration and reminders.
- Count Tool (I): Counts objects within your image, automatically marking them.
Retouching and Painting
- Spot Healing Brush Tool (J): Quickly removes blemishes and small imperfections by seamlessly blending them with the surrounding pixels.
- Healing Brush Tool (J): Similar to the Spot Healing Brush, but requires you to define a source area to sample pixels from for the healing process.
- Patch Tool (J): Allows you to select a problem area and replace it with pixels from another area of your image.
- Content-Aware Move Tool (J): Moves or extends selected objects, intelligently filling the vacated space with surrounding pixels.
- Red Eye Tool (J): Removes red eye caused by camera flash.
- Brush Tool (B): The versatile brush tool for painting, shading, and creating various effects. You can customize brush size, hardness, and opacity.
- Pencil Tool (B): Creates hard-edged lines, similar to a pencil.
- Color Replacement Tool (B): Replaces a specific color with another color.
- Mixer Brush Tool (B): Simulates realistic paint mixing, blending colors directly on the canvas.
- Clone Stamp Tool (S): Duplicates pixels from one area of your image to another. It’s essential for removing distractions or repairing damaged areas.
- Pattern Stamp Tool (S): Paints with a repeating pattern.
- History Brush Tool (Y): Paints back to a previous state of your image, using a snapshot from the History panel.
- Art History Brush Tool (Y): Paints with stylized strokes, based on a snapshot from the History panel.
- Eraser Tool (E): Erases pixels from your image.
- Background Eraser Tool (E): Erases pixels based on color, making it easier to remove backgrounds.
- Magic Eraser Tool (E): Erases entire areas of similar colors with a single click.
- Gradient Tool (G): Creates a smooth transition between two or more colors.
- Paint Bucket Tool (G): Fills an area with a solid color.
- 3D Material Drop Tool (G): (If applicable) Drops materials onto 3D models.
Drawing and Type
- Blur Tool (R): Blurs areas of your image, softening details.
- Sharpen Tool (R): Sharpens details in your image, enhancing edges.
- Smudge Tool (R): Smudges colors together, creating a soft, blended effect.
- Dodge Tool (O): Lightens areas of your image.
- Burn Tool (O): Darkens areas of your image.
- Sponge Tool (O): Saturates or desaturates colors in your image.
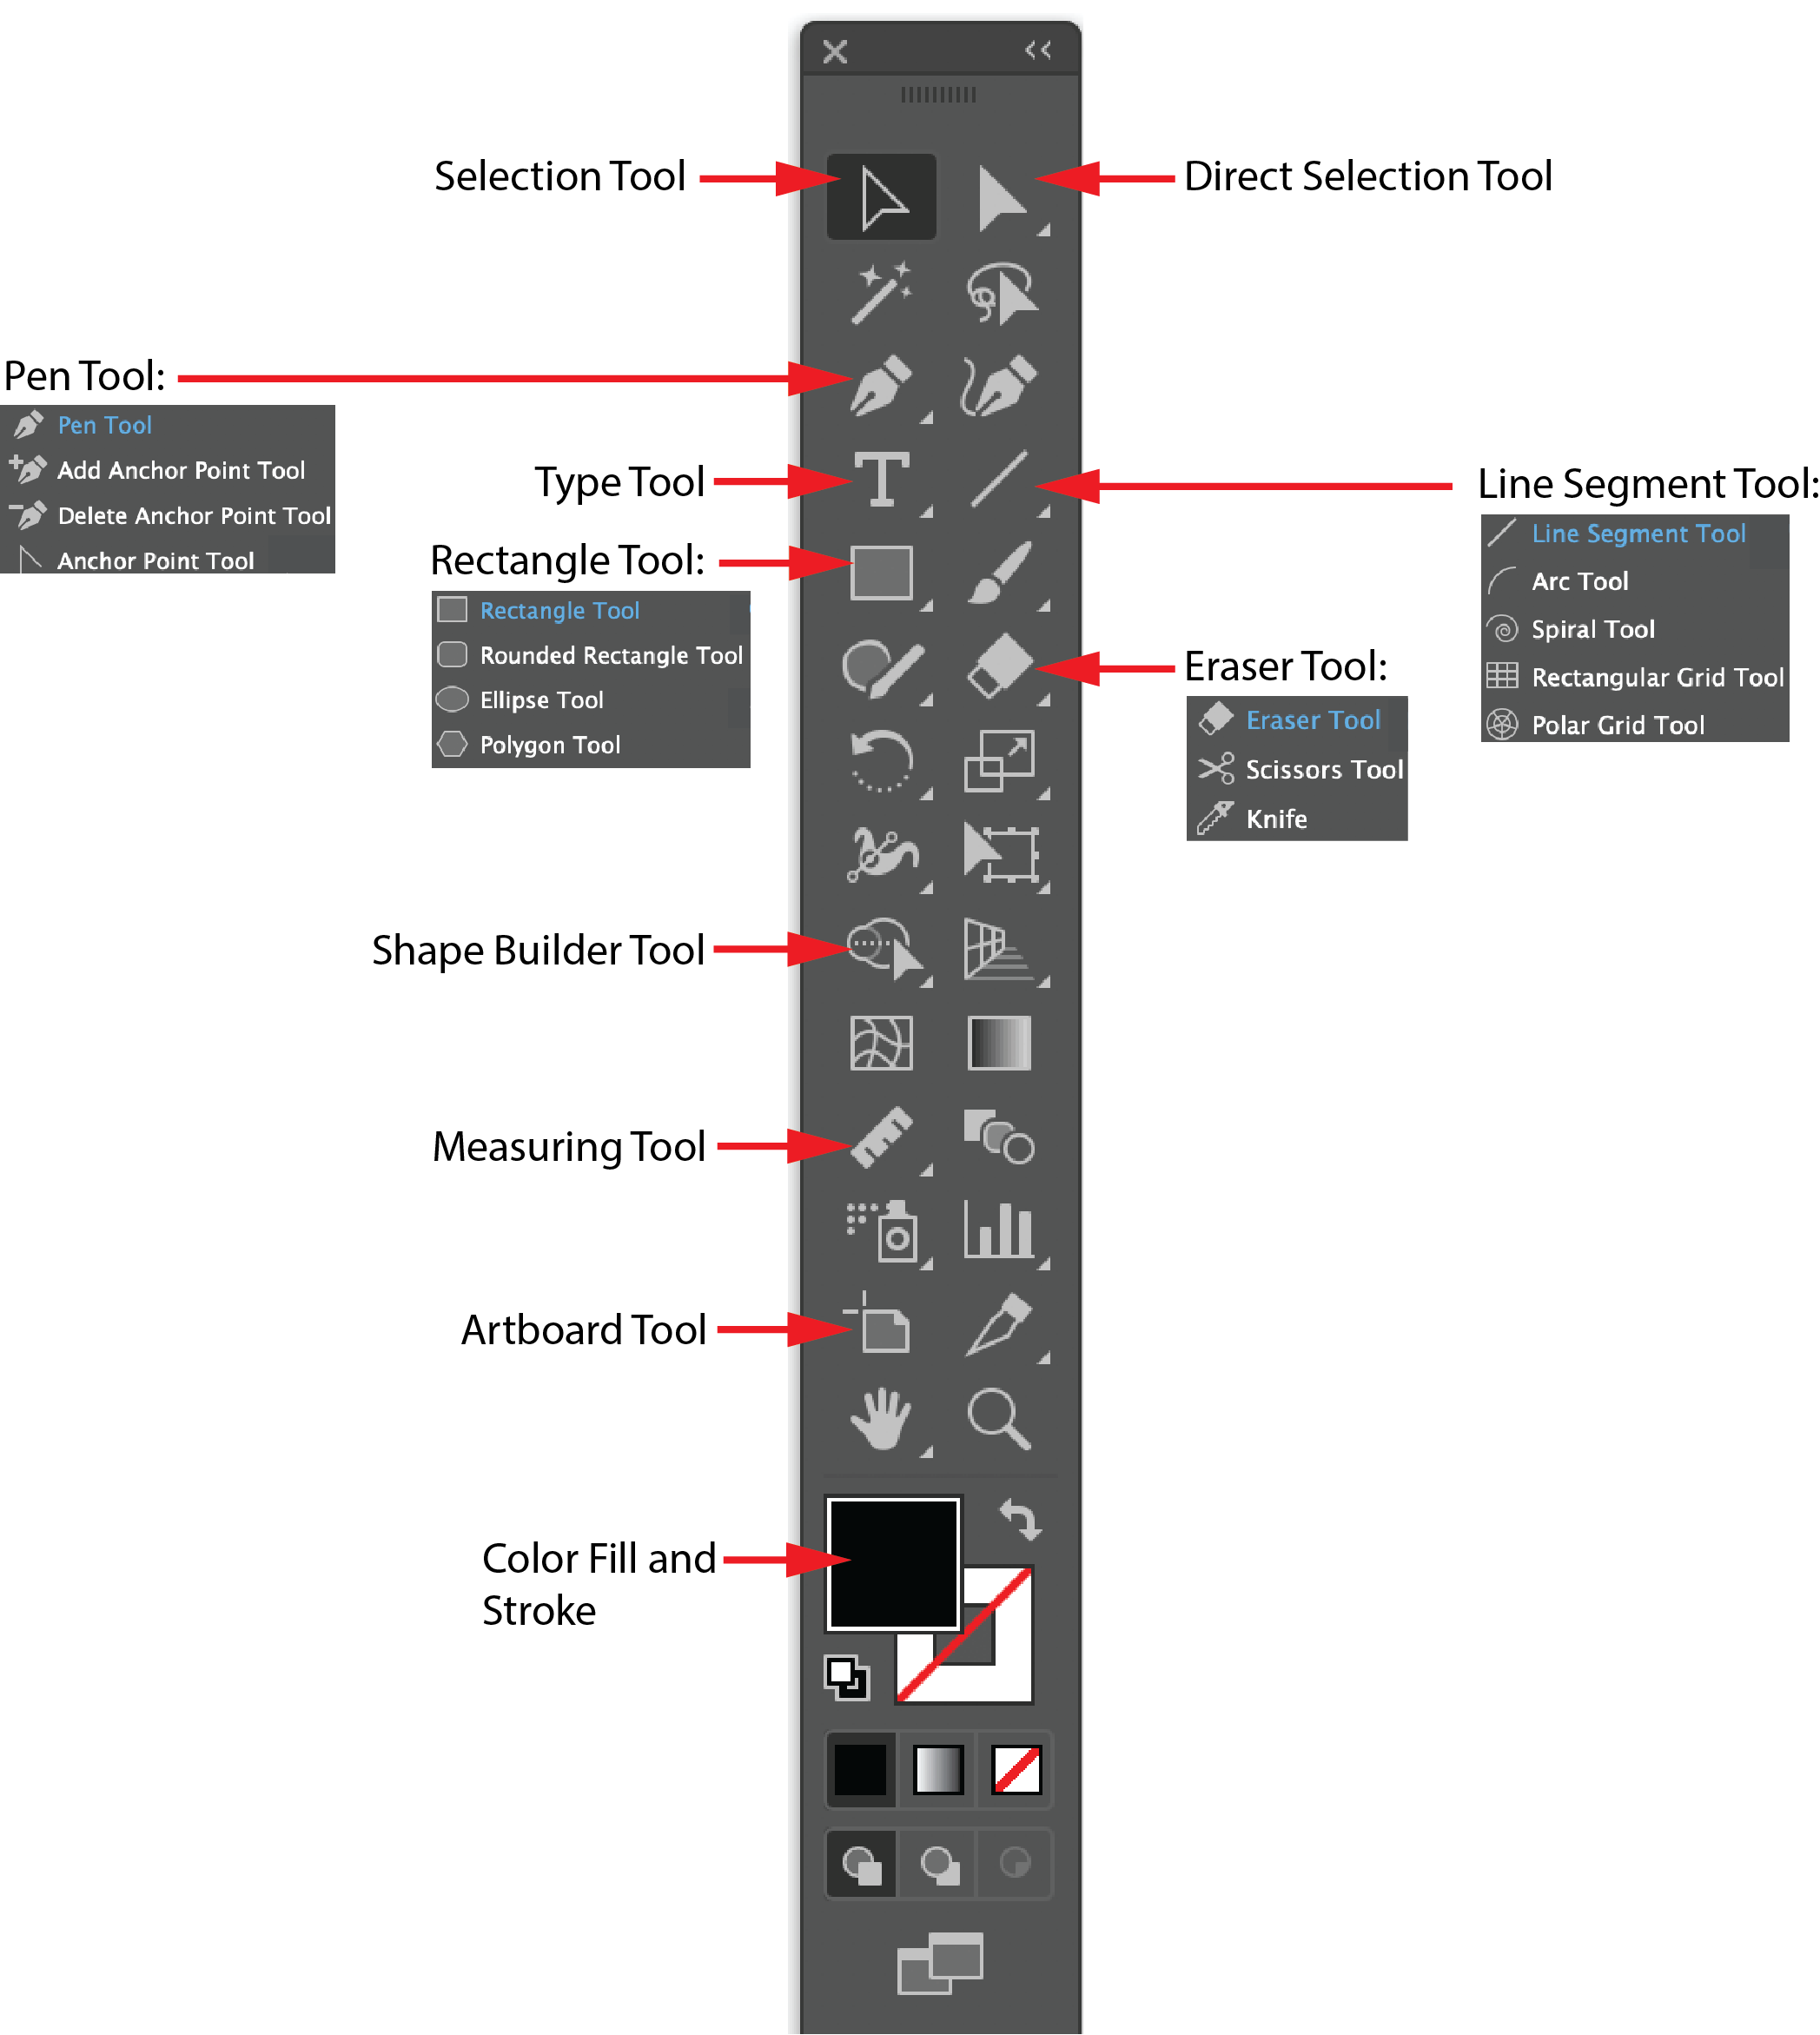
- Pen Tool (P): Creates precise paths and vector shapes. This is fundamental for logo design and intricate selections.
- Freeform Pen Tool (P): Allows you to draw paths freehand.
- Add Anchor Point Tool: Adds anchor points to existing paths.
- Delete Anchor Point Tool: Removes anchor points from existing paths.
- Convert Point Tool: Converts between smooth and corner points on paths.
- Horizontal Type Tool (T): Adds horizontal text to your image.
- Vertical Type Tool (T): Adds vertical text to your image.
- Horizontal Type Mask Tool (T): Creates a selection in the shape of horizontal text.
- Vertical Type Mask Tool (T): Creates a selection in the shape of vertical text.
- Path Selection Tool (A): Selects entire paths.
- Direct Selection Tool (A): Selects individual anchor points and segments of paths.
- Rectangle Tool (U): Draws rectangles and squares.
- Rounded Rectangle Tool (U): Draws rectangles with rounded corners.
- Ellipse Tool (U): Draws ellipses and circles.
- Polygon Tool (U): Draws polygons with a specified number of sides.
- Line Tool (U): Draws straight lines.
- Custom Shape Tool (U): Draws from a library of pre-defined shapes.
Navigation and Color
- Hand Tool (H): Navigates around your image by dragging the canvas.
- Rotate View Tool (R): Rotates the view of your canvas without rotating the image itself.
- Zoom Tool (Z): Zooms in and out of your image.
At the bottom of the Toolbar, you’ll find the **Foreground/Background Color Pickers**. These allow you to set the colors used by your painting and drawing tools. Below that is the **Quick Mask Mode** button, which lets you create and edit selections using brush strokes. Finally, you’ll find the **Screen Mode** options, which control how Photoshop is displayed on your screen.
This overview provides a starting point for understanding the Adobe Photoshop Toolbar. Experiment with each tool, explore its options, and discover how it can contribute to your creative process. The more familiar you become with these tools, the more efficiently and effectively you’ll be able to bring your visions to life.
If you are searching about Adope Photoshop Tool Bar (By: Shujaat Abbas) | PPT you’ve came to the right page. We have 22 Images about Adope Photoshop Tool Bar (By: Shujaat Abbas) | PPT like 13 Photoshop Tool Bar Images – Photoshop Toolbar, Photoshop Elements, 13 Photoshop Tool Bar Images – Photoshop Toolbar, Photoshop Elements and also 13 Photoshop Tool Bar Images – Photoshop Toolbar, Photoshop Elements. Read more:
Adope Photoshop Tool Bar (By: Shujaat Abbas) | PPT
www.slideshare.net
Adobe Photoshop Toolbar Introduction | PPT
www.slideshare.net
Adobe Photoshop Tool Bar | Graphic Design Tutorials, Photoshop Cs6

www.pinterest.com
Photoshop Toolbar Evolution | Photoshop, Photoshop Tools, Graphic

www.pinterest.com
Photoshop Toolbar – Photography 8 Diagram | Quizlet

quizlet.com
Adobe Photoshop Toolbar Introduction | PPT
www.slideshare.net
Photoshop CS4 Tool Bar Basic Photoshop Tutorials, Photoshop Software

www.pinterest.com.au
A Look Through The Years – Adobe Photoshop Turns 25 | Fstoppers

fstoppers.com
Adobe Photoshop Toolbar Introduction | PPT
www.slideshare.net
How To Make Your Photoshop Toolbar Bigger (In 2 Steps) | LP Club
www.learn-photoshop.club
PhotoShop Toolbar Evolution | Puppies And Flowers

www.puppiesandflowers.com
Photoshop-tools-overview.pdf
www.slideshare.net
Photoshop Toolbar For Beginners – Artofit

www.artofit.org
Photoshop Illustrator Toolbar Icons By Creative Vip – Vrogue.co
![]()
www.vrogue.co
13 Photoshop Tool Bar Images – Photoshop Toolbar, Photoshop Elements
www.newdesignfile.com
Photoshop Tool Bar
digitalphotohs.weebly.com
Photoshop Interface Vector Art, Icons, And Graphics For Free Download
![]()
www.vecteezy.com
Introducing Photoshop Toolbar For Photoshop Users | PPT
www.slideshare.net
Mengenal Tool Photoshop CS6 Dan Fungsinya – TUTORiduan.com
www.tutoriduan.com
Barra Herramientas Illustrator Photoshop Indesign Pho – Vrogue.co
www.vrogue.co
13 Photoshop Tool Bar Images – Photoshop Toolbar, Photoshop Elements
www.newdesignfile.com
Photoshop Toolbar: A Complete Guide To The Tools
clippingpathstudio.com
Adobe photoshop toolbar introduction. 13 photoshop tool bar images. How to make your photoshop toolbar bigger (in 2 steps)